Purpose. Clean, inspect the roof. Secondary, wax roof, wax front end cap.
I separated the roof and vent projects. Putting on a vent is separate deal. A lot of us have talked about our roofs etc. So I decided would get up there and give it a look. I cleaned the roof when I got the Beast back in January 2013 from a ladder and using poles.
I set up a ladder to be able to get up and down without using the RV ladder. I have climbed on that ladder, but I consider it for WHEN ONLY and do not want to put added stress on it. Set up my ladder. I used my largest ladder. heavier and taller, more stable though. Added some towels around the top for side protection.
I took the picture holding the camera in my right hand. I did this to show how easy was to get on to the roof with my ladder. Normally grabbed the rails to step up to the top. Note. This is really the only good spot on the unit to do this so you step on the roof and hold the hand rails. Sky light is on the other side. If you do not have hand rails (Ron?) might want to try by the kitchen vent it might give you a little support, not sure just a suggestion.
PLEASES NOTE. I wrote this as do it yourself. Getting on the roof of your RV is and can be dangerous. My Phoenix Cruiser has a railing on the rear which made it very accessible. The Cruiser is also built to hold someone on the roof. If you do not have railings it may be hard to get on the roof easily as I did. Again I did not want to use the ladder on my unit to put more stress on it. I would have no problem using it if needed.
First ideal was to use the ladder to go around and clean as far as I could reach. I was originally planning on using Clorox, gently, wipe and clean. I had some Simple Green cleaner and started using it first. After cleaning a little, realized it was working great and did not need the Clorox. I hated to think about using the Clorox and was going to spray a little wipe, rinse etc all by hand. Did not want to think about any bleach getting on the rest of vehicle. This was going to be a very slow process, but I wanted to get that roof clean. So with a toothbrush, scrubber, towels and lots elbow grease got her clean. Was able to use the hose on top of the RV. I was very gentle with the water, so most of it went on to the small gutters and ran off the back.
Moved the ladder to the rear same side. Was able to use the luggage rack bars and climb right on the top of the RV with no problem. Roof is very sturdy no problem.. It did sway a little when I walked, which was very carefully. Did most of the work on my knees and sitting. I ran the water hose up and hooked it to the luggage rack.
One job was to inspect the roof caulking,, mainly in good shape, had a few spots added some caulking too. I need to replace both covers on the sewer pipes. Very brittle.
Took the two covers off. No problem. I could tell the area under the AC was very dirty. Could not do the under cover off the AC, cleaned under it with a toothbrush. NOTE. I was very careful around the AC area. Since that is a large opening I attempted not to stand too close to it. Figure that is one of the weakest spots on the roof. May be wrong, but took no chances.
You can see area from Kvent very dirty, under AC area was the same, inside AC unit was a little dirty not too bad.
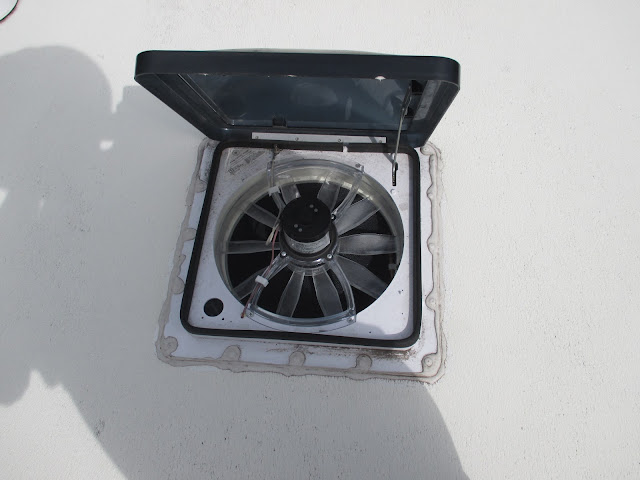
Fans were very dirty around the edges. Cleaned up the fans, fan blades. Used a small vacuum to clean.
As part of this project I did put on one fan cover which I did as another project, if interested you can see the project at http://addingaroorvent.blogspot.com/
Took both covers to the ground. cleaned them up. The insulating foam underside of AC cover had come loose. Re-glued. Put a coat of Marine wax on both covers, took them and re-installed
AC unit all cleaned and ready for cover.
To the left is the front of RV nice and clean.
Cleaned Kvent area.
Both fans cleaned up and ready.
Finished cleaning, hard to tell but roof looks very nice. First thing prior to waxing was to put some sponge bumpers on for the antenna ( Ron D. had mentioned this in one of his tips.
I used some self adhesive sponge blocks. Will see how they stick. After I waxed I noticed that the spots had gotten off center. Will wait till next use and see when I raise the antenna if it centers or I need bigger blocks.
Prior to waxing I got on my step ladder and marked each side with green tape next to pass/driver window as far as I could comfortable reach. From the two pictures it a V from the top of the cap lights to the windshield. On top it is a parallel lines from the end cap lights.approx 2 ft.
Laid down and carefully snaked down as far as I could in the center of the cap area. BTW, the cap is very solid. I could comfortably reach the nearly to the top of the windshield. Cleaned the areas on the cap. Use Mcquires Marine wax. This is actually the second day on the roof. One thing it is to hot. After about 2/3 hours I've had enough. The area I worked on, the cap, right side of antenna and coat of wax on plastic part of antenna, also left side of AC. Left the middle not waxed. I want to finish any spots on the cap, then work the middle towards the rear. Note you can see the green tape I used to mark spot I could reach on the step ladder.
Another day, put another coat of wax on the cap prior to finishing the roof. Hard to show results due to glare, but you can see the shine. Looks very good. When I bring the Beast back home in the fall will put another coat on it. NOTE: front cap and rear shell cap are different materials than the side panels. The side panels have a good coat of gel coat on them so do not waste your Marine Wax (it's expensive) on the side panels. Use your other wax, same as car. Suggestion, use it on the end caps of the awnings. Note, you may notice a cover on the wind shield now that's part of my window project
Sunday 7/27, I'm getting a little tired of the roof project. I wanted to go ahead wax the two side pieces and the rear cap. Front cap already done. I used the cleaner wax as the first coat, then applied a second coat using just the premium wax. I am very impressed with this product once again. Main problem right now it's very hot and humid,,, not good waxing weather. How ever I wanted to get a coat or two on the caps and see how it does. When I get the Beast out of storage in the fall will do another coat or two. I did not wax the decal area except the small one on the side. On the back cap went down to the paint line again. Did not wax the rear storage door, different material (same as the RV walls).. I put a coat on the endings for the big awning, the vent cover for the stove fan, the door light and the shower cover. Also put a coat on the mirrors even though they look pretty good.
NOTE: Front cap extends down on the two angled pieces by the driver and pass sides. I would also use Marine Wax on those two side pieces. Rear is app one piece. Mind is 1/2 covered and the paint decal is holding up very well. Rest of the end cap is ok but will use the Marine wax on it also. You have to figure the front cap gets a lot more abuse than the rear and starts showing wear sooner. Does not hurt to get wax on the decals or the Phoenix sign on the rear. You want to go from small to large on the decals. On the lettering use a rag with your finger as the pressure point.
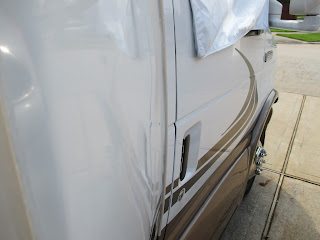
Side piece coming down from the roof cap,, polished looks very nice.
Roof finished and was. I used the Marine Cleaner Wax for the roof. Same as cleaning did sections working the sides, then the middle. I can feel the difference in the roof. The roof is textured so that is why the dirt get into the little crevices.
I put 2/3 coats of wax on all the covers AC, kitchen cover, fan, fan cover, antenna, and the sky light.As I worked my way to the back had to use the ladder to finish last section.
You can see my new fan cover. Also cleaned the railings.
FINAL NOTES: This was a large project and took a lot of time and work. At the same time I was doing a fan cover project . Cost was not to bad. I paid 47.00 dollars for the wax, Mequiar's Marine Premium cleaner/wax and Maine Premium Wax. I am very pleased with both products. Lots of people recommend them on the forums and they are right. I used less than half of the wax/cleaner and about 1/3 of the wax.
As I noted by using the my big step ladder it was no problem getting on and off the roof. On some mornings I had to wipe the roof down due to moisture. Usually I waited till 10/11, but it was getting to hot. I was very careful when I walked around and always held the railings getting off/on the ladder.
Next time I do this project though it will be the fall or spring,, summer was too hot. I would suggest you do it when it sort of warm, at least the high 70's or 80's. Helps with cleaning and drying/hazing the wax. Since we are part time figure I can by every two years for this necessary headache project. haha
One last thing I did this write up mainly for Phoenix Cruiser owners. I do post on other forums so some of the rigs will be different and you may have to modify to your own rig. Good Luck.


